An easy-to-use desktop application to manage OSGi frameworks remotely
OSGi.fx is an easy-to-use application to remotely manage OSGi frameworks. Similar to Felix web console, this is an endeavour for desktop application users to provide all the necessary functionalities to remotely manage OSGi runtimes.
Application Screenshots
Implemented Features
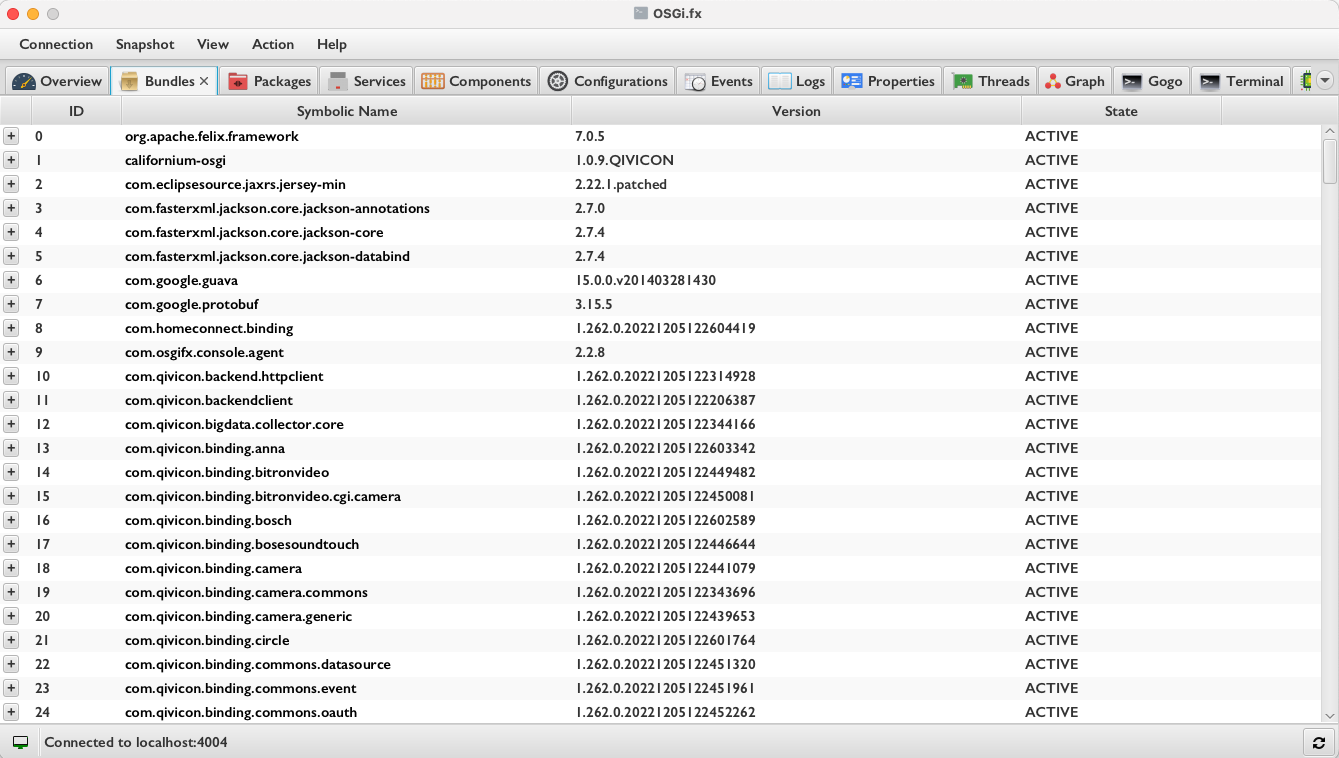
| List all installed bundles and fragments |  |
| List all exported and imported packages | |
| List all registered services | |
| List all registered DS components | |
| List all available system and framework properties | |
| List all daemon and non-daemon threads | |
| Send synchronous or asynchronous events on demand | |
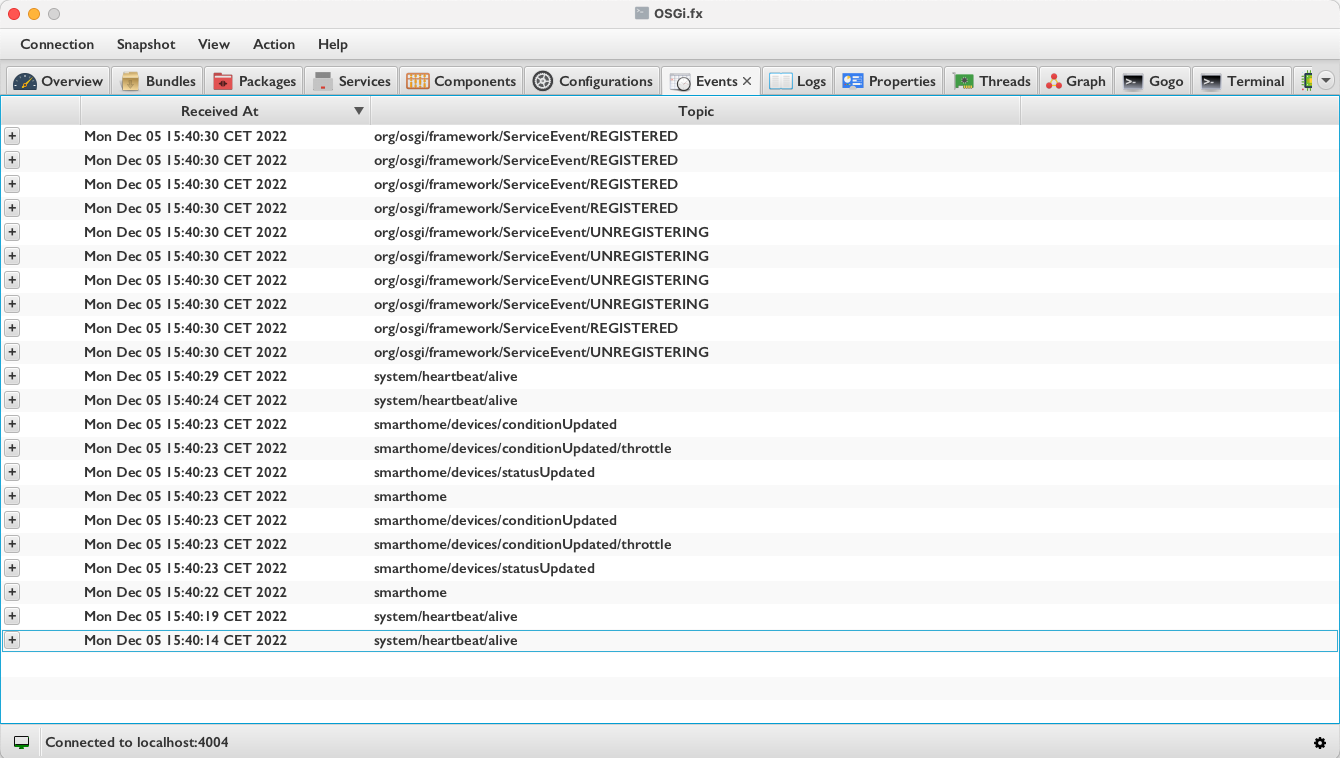
| Receive events on demand (option to start and stop receiving events) | |
| Receive logs on demand (option to start and stop receiving logs) | |
| Manage R7 Logger Configurations | |
| Execute Gogo command | |
| Execute CLI command | |
| Auto-completion of all available remote Gogo commands during command execution | |
| Install or update bundles | |
| Drag and drop support of bundles (on Install Bundle Dialog) while installing or updating | |
List available configurations from ConfigurationAdmin |
|
List Metatype property descriptors |
|
| Start/stop/uninstall bundle or fragment | |
| Enable/disable DS component | |
| Update/delete existing configuration | |
| Create new configuration using metatype descriptor | |
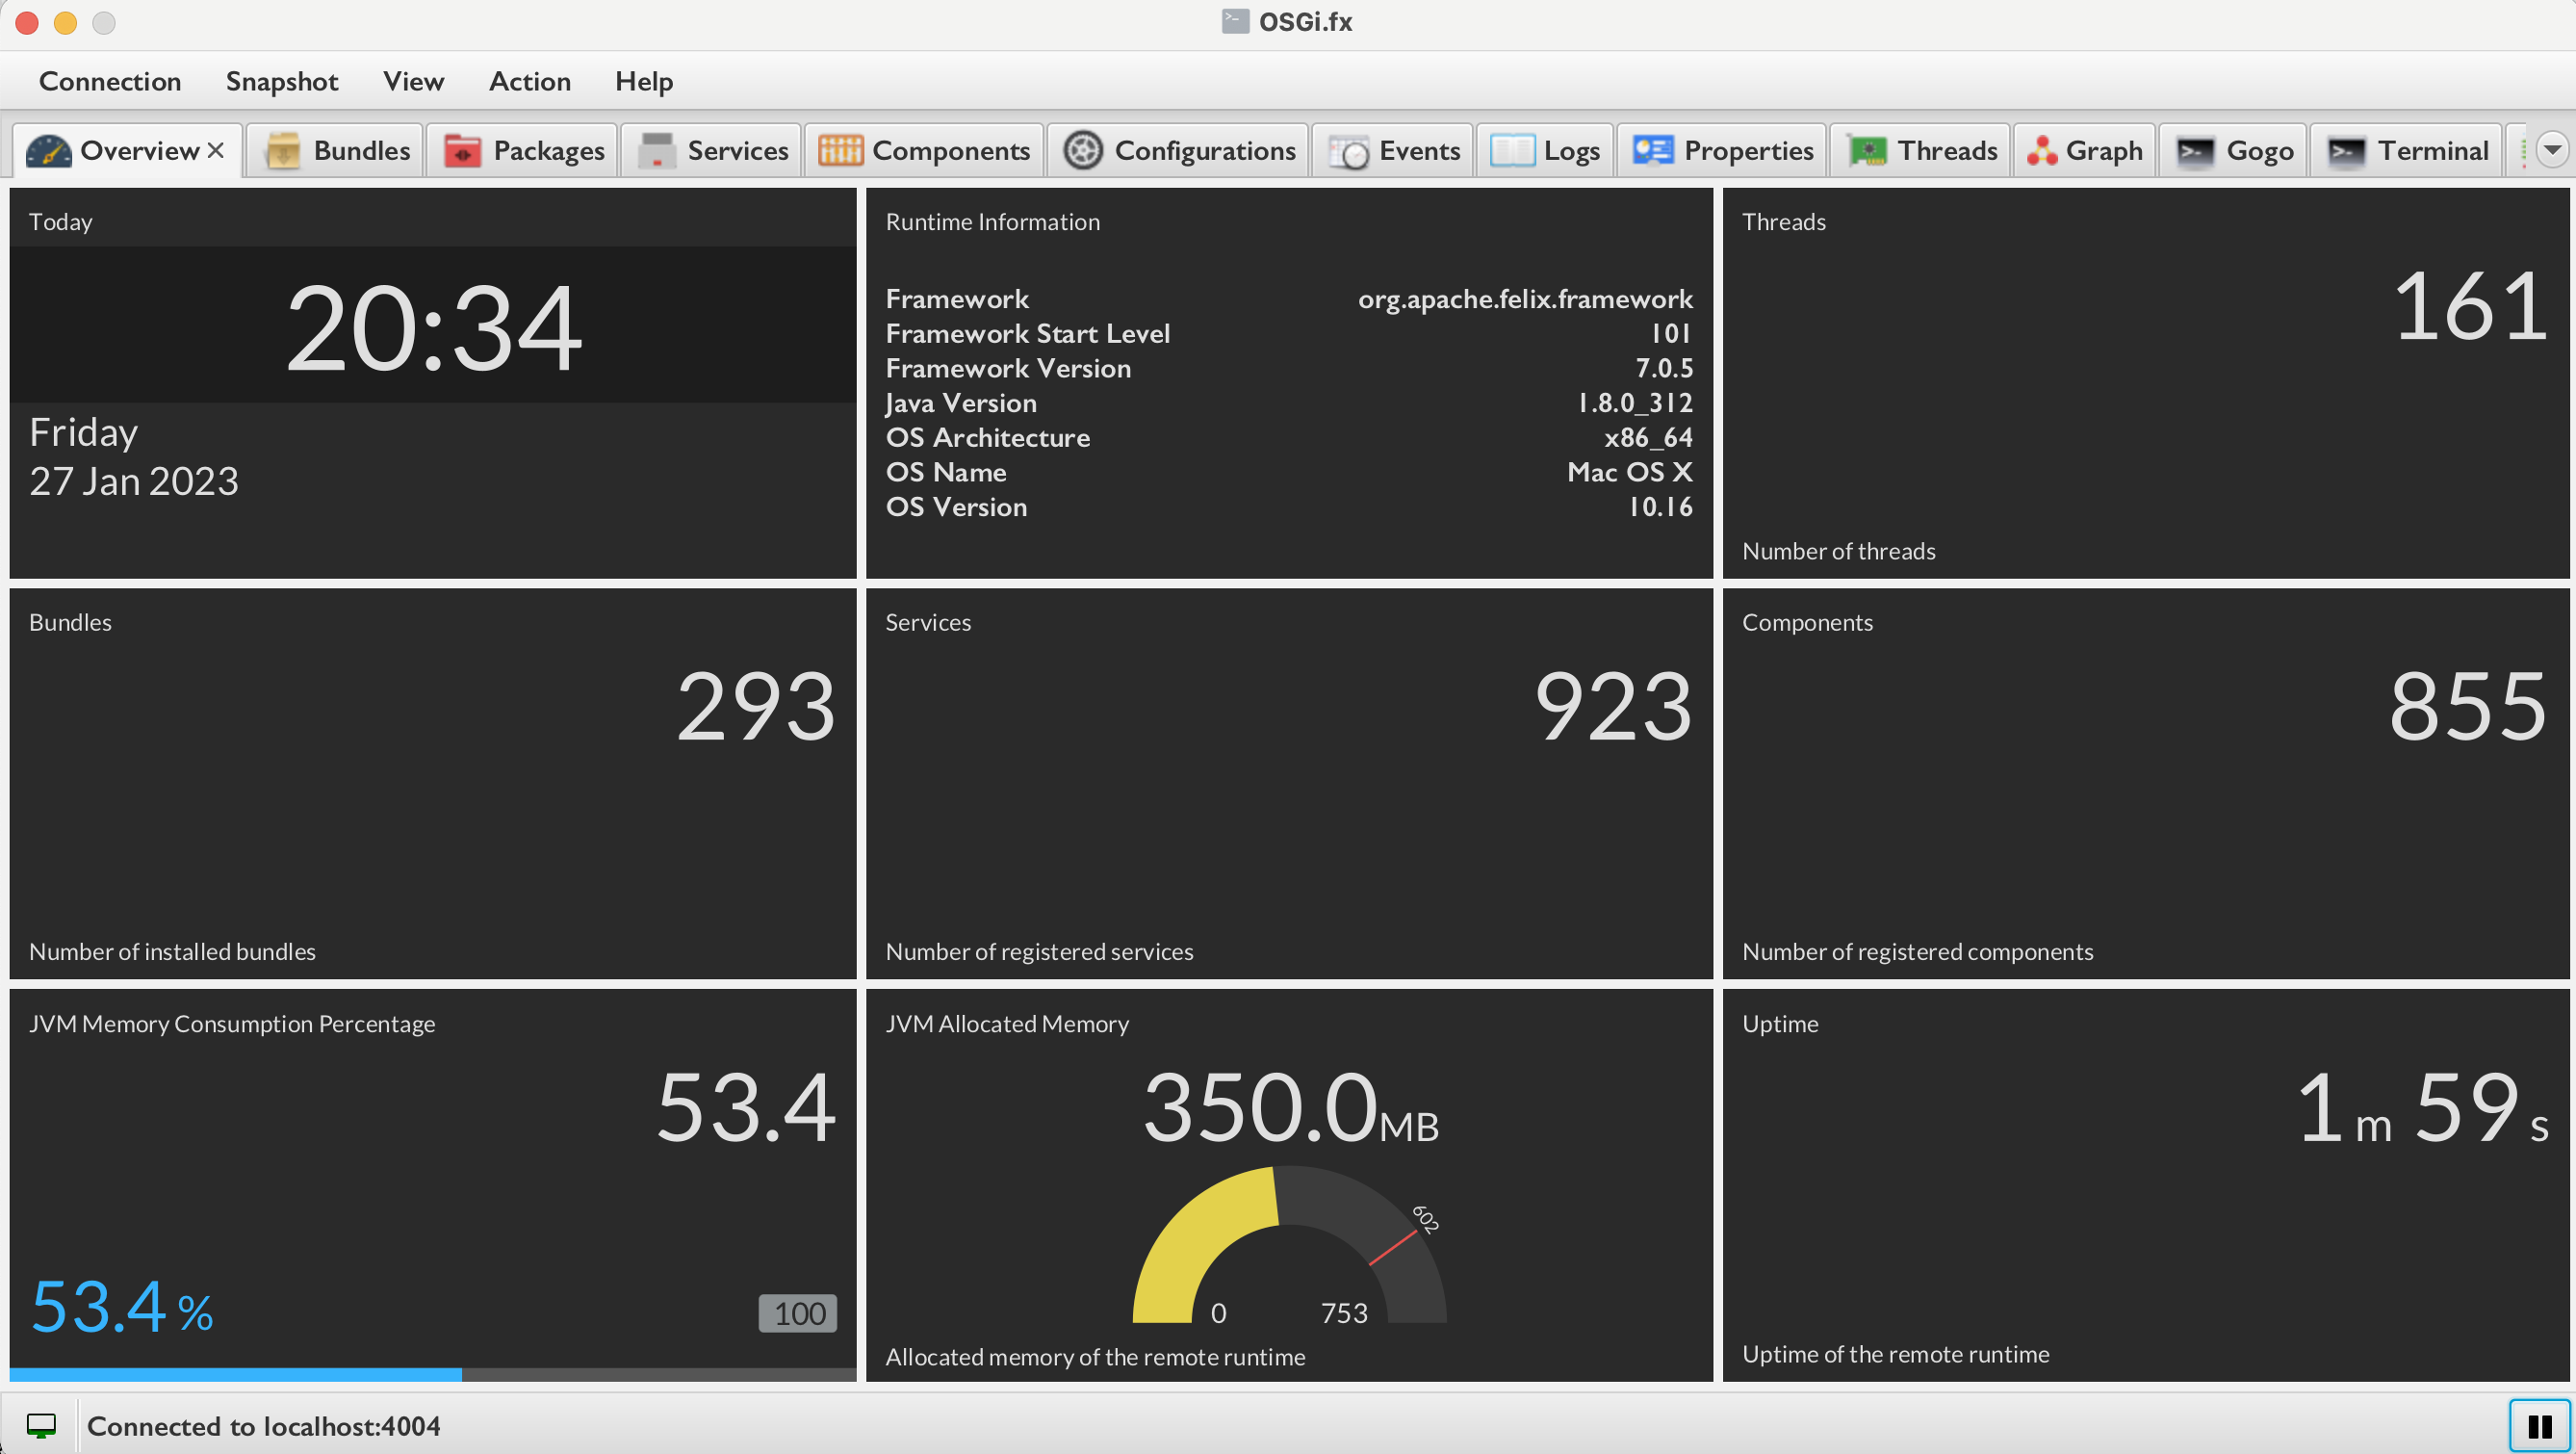
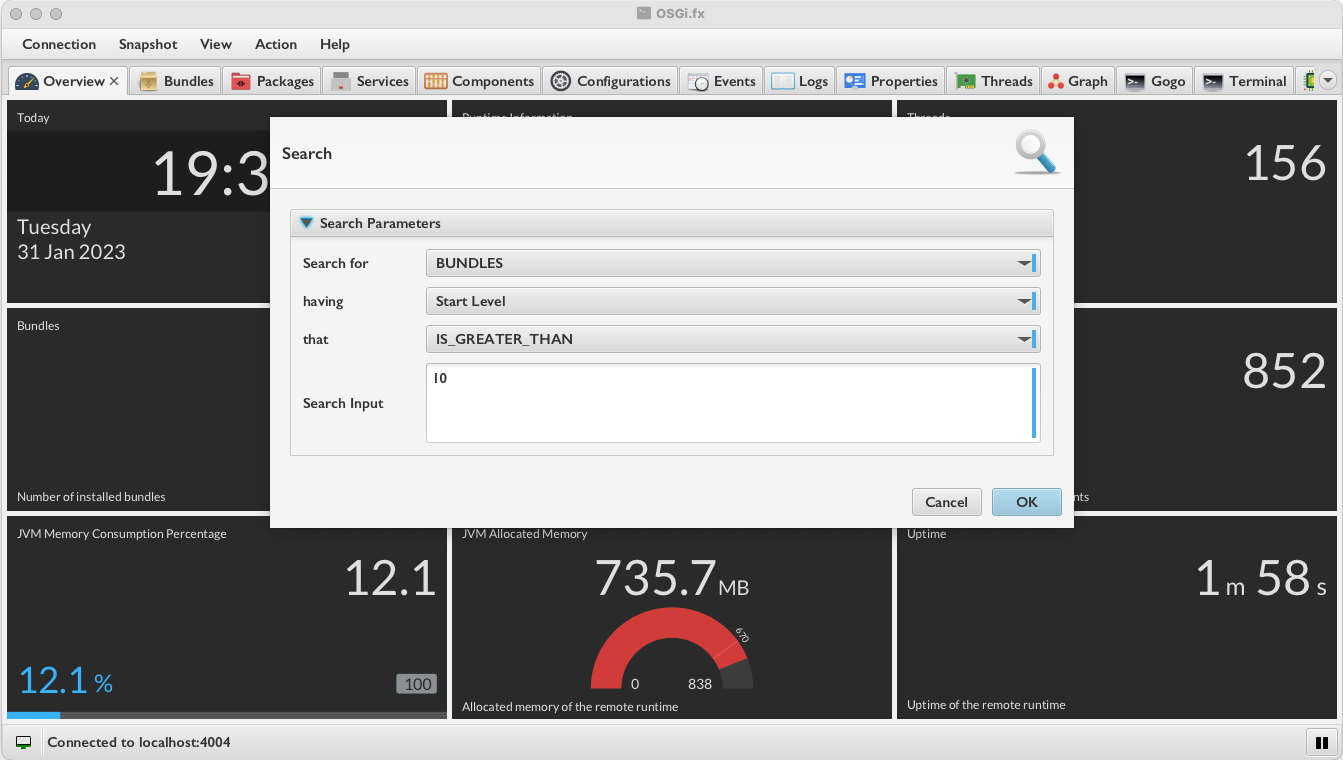
| Overview of the remote OSGi framework (memory consumption, uptime, framework information, number of bundles, number of threads, number of services and number of DS components) | |
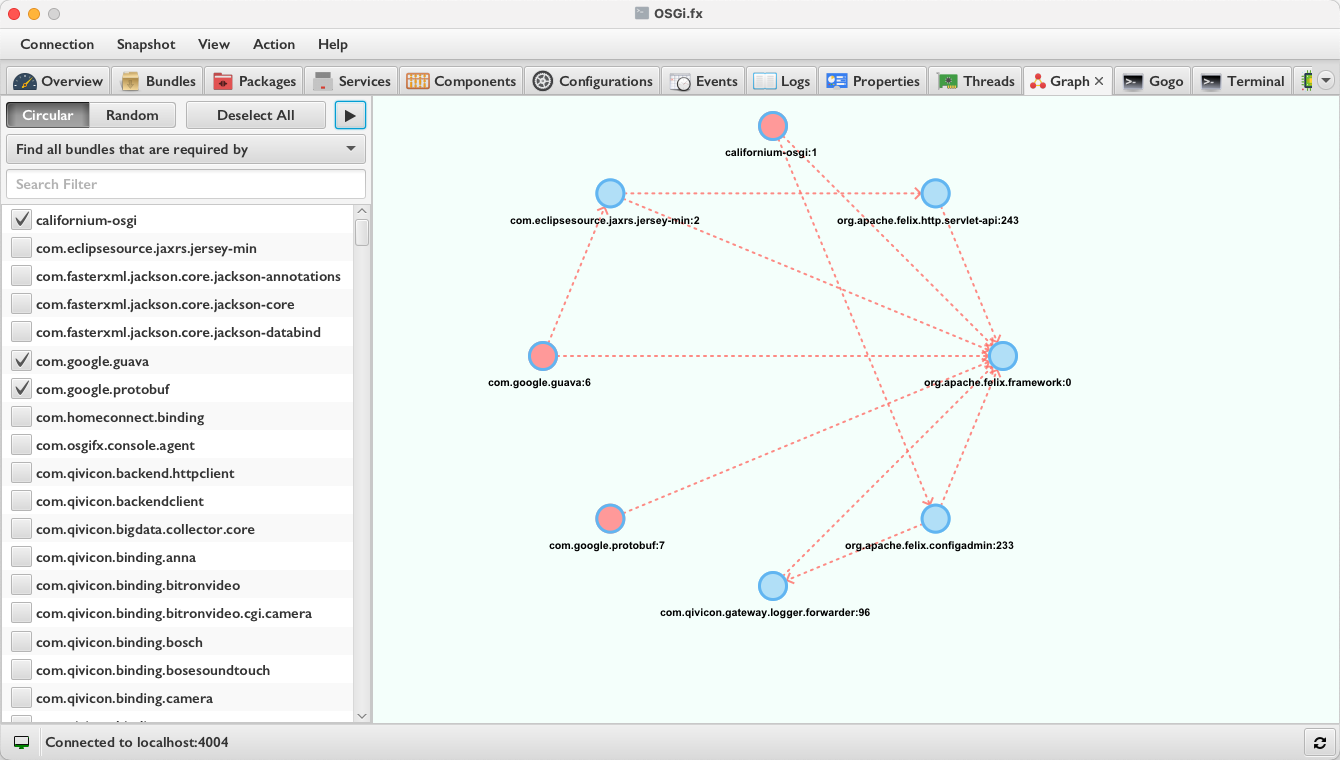
| Generate dependency graph for bundles | |
| Generate dependency graph for DS components | |
| Find all cycles between available DS components | |
| Export generated dependency graph to DOT (GraphViz) format (Right click on generated graph) | |
| Open Diagnostics (Show application log file) | |
| Show suspicious classloader leaks | |
| Show HTTP runtime components (Servlets, Listeners, Filters, Resources and Error Pages) | |
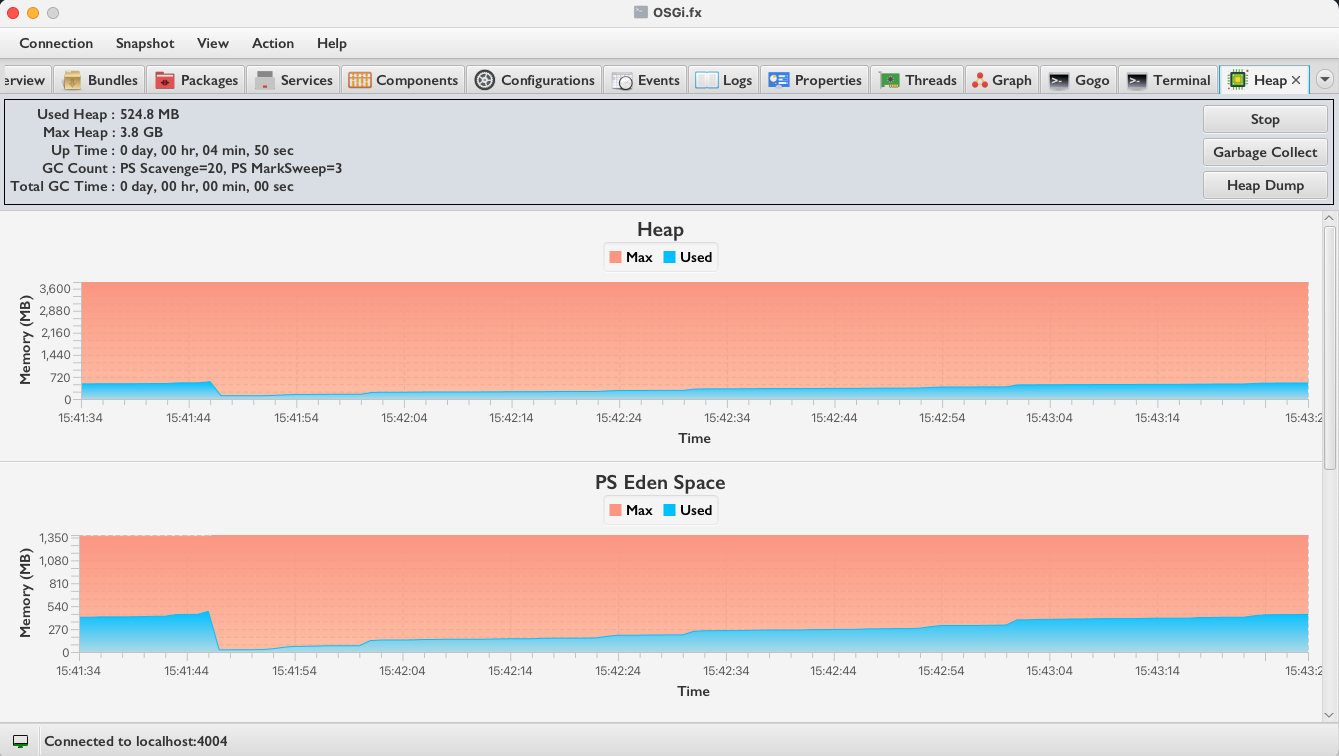
| Shows heap usage over time and the count of garbage collections | |
| Install extension (plugin) | |
| List and uninstall already installed feature(s) | |
| Generate OBR XML | |
| Device Management Tree (DMT) Traversal and Update | |
| Manage User Admin Roles | |
| Execute Felix Healthchecks | |
| Capture/Read Snapshot | |
| Display OSGi Runtime DTOs | |
| Advanced Search | |
Tools and Technologies
| Java (Application) | 21 |
| Java (Agent) | 1.8 |
| Rich Client Platform | JavaFX 21 |
| Runtime Frameworks | OSGi R8 (Equinox), Eclipse 4 (e4), e(fx)clipse |
| UI Libraries | ControlsFX, TilesFX, FormsFX |
| Tools | Bndtools 6.4.0 |
Important Notes for Download and Update
- The application is distributed through jdeploy enabling developers to distribute native applications effortlessly
- Note that, the required VM will directly be downloaded while installing the application using
jdeploy - Also note that, if the auto-update feature is enabled, every new version will be automatically downloaded while starting the application
- Due to the update of the application, the application might not work expectedly as the old bundle cache (OSGi storage) still exists. That’s why, make sure to delete the existing OSGi storage area located in
~/.osgifx-ws
Minimum Requirements for Runtime Agent
- Java 1.8
- OSGi R6
- Install
com.osgifx.console.agent.jarfrom maven central
Socket
Set osgi.fx.agent.socket.port system property in the runtime. Note that, you can either set the property to any port e.g. 2000 or 0.0.0.0:2000. The latter one will allow remote connections whereas the former one will only allow connections from localhost.
Note that, if you want to secure sockets, you additionally need to set osgi.fx.agent.socket.secure property to true and set osgi.fx.agent.socket.secure.sslcontext.filter property to any value you like (this is not an LDAP filter but will be used in a LDAP filter), for example: osgi.fx.agent.socket.secure.sslcontext.filter=my_sslcontext. For secure communication, you also need to generate your truststore as well which you need to configure in the OSGi.fx application as well.
MQTT
To use MQTT, you have to install the in.bytehue.messaging.mqtt5.provider.jar from OSGi Messaging. This project implements the draft OSGi messaging specification. Note that, you have to configure the in.bytehue.messaging.client PID in configuration admin for this library to work. You can find the relevant configurations in the project’s README. Also note that, you have to specify maximumPacketSize and sendMaximumPacketSize to 268435456 in the configuration. It denotes that the client will be able to send and receive packets of 256 MB in size. Note that, you have to download this JAR from Github Packages.
Additionally, you also have to set osgi.fx.agent.mqtt.pubtopic property where the agent will send the responses to and set the osgi.fx.agent.mqtt.subtopic property where the agent will receive the requests from.
Note that, in several scenarios, people tend to use OAuth tokens to be retrieved from authorization server and use the token as the password for the MQTT connection. To support this, you can also configure the token configuration in the OSGi.fx application and leave the Password field empty. Note that, the token configuration must be provided as a valid JSON in the following format:
{
	"authServerURL": "",
	"clientId": "",
	"clientSecret": "",
	"audience": "",
	"scope": ""
}
You can also ignore the clientId in which scenario, the application will use the configured MQTT client ID as the client ID for retrieving the token. Once the OAuth POST request is sent to the authorization server, the server should respond with a JSON having the following format:
{
	"access_token": "",
	"expires_in": 100 (only integer value is supported here)
}
Once this is configured, the OSGi.fx application will automatically retrieve the token for every session and authenticate with the broker.
Batch Install
You can also install multiple bundles and create multiple configurations in one go. For that, you have to select the directory after clicking on Batch Install from the Actions menu. Note that, you should keep all bundles and configuration JSON files in the selected directory. The Batch Install will list only the JARs and JSON files from the directory. You can then choose from the list which JARs to install and which configurations to create.
Note that, the configuration JSON files need to comply with OSGi Configurator Specification
Extension Development
External plugins or extensions can easily be developed for OSGi.fx. Please have a look at how the bundles with com.osgifx.console.ui.* project name pattern are developed. As a starting point, please have a look at the sample Tic-Tac-Toe. Since OSGi.fx has itself been developed using OSGi and Eclipse e4, you can easily leverage their modular capabilities to build your own extensions.
Once the extension is developed, you can test it by installing it from the Help -> Install Extension menu option.
Note that, to develop an extension, you need to provide OSGi Deployment Package archive. Have a look at OSGi Deployment Admin Specification on how to prepare such deployment packages.
For ease of development, you can use the OSGi.fx workspace to further develop your own extensions as the workspace comprises a new bnd plugin which will enable you to automatically generate a deployment package from a bndrun file. As an example, please refer to the sample Tic-Tac-Toe extension.
Project Import for Development
- Install Java 17 JDK Distribution (including JavaFX modules) in your machine (Currently I am using Zulu Distribution that includes JavaFX modules already)
- Set the newly installed JDK 17 to your
JAVA_HOME - Install
Eclipse IDE for RCP/RAP Developersand make sure your Eclipse installation uses the currently installed JDK to start with - Install
Bndtoolsande(fx)clipsefrom Eclipse Marketplace - Go to
Java->Compilerin Eclipse Preferences and setCompiler Compliance Levelto17 - Go to
Java->Installed JREsand select the newly installed JDK with JavaFX modules - Go to
Java->Installed JREs->Execution Environmentsand selectJavaSE-17and choose the recently installed Java 17 JRE that includes JavaFX modules - Import all the projects (
File -> Import -> General -> Existing Projects into Workspaceand selectSearch for nested projects)
Building from Source
Run ./gradlew clean build in the project root directory
Developer
Amit Kumar Mondal (admin@amitinside.com)
Contribution
![]()
License
![]()